sewing tutorial

Kiss the Cook Table Runner

kiss-the-cook.gif

IMG_1373
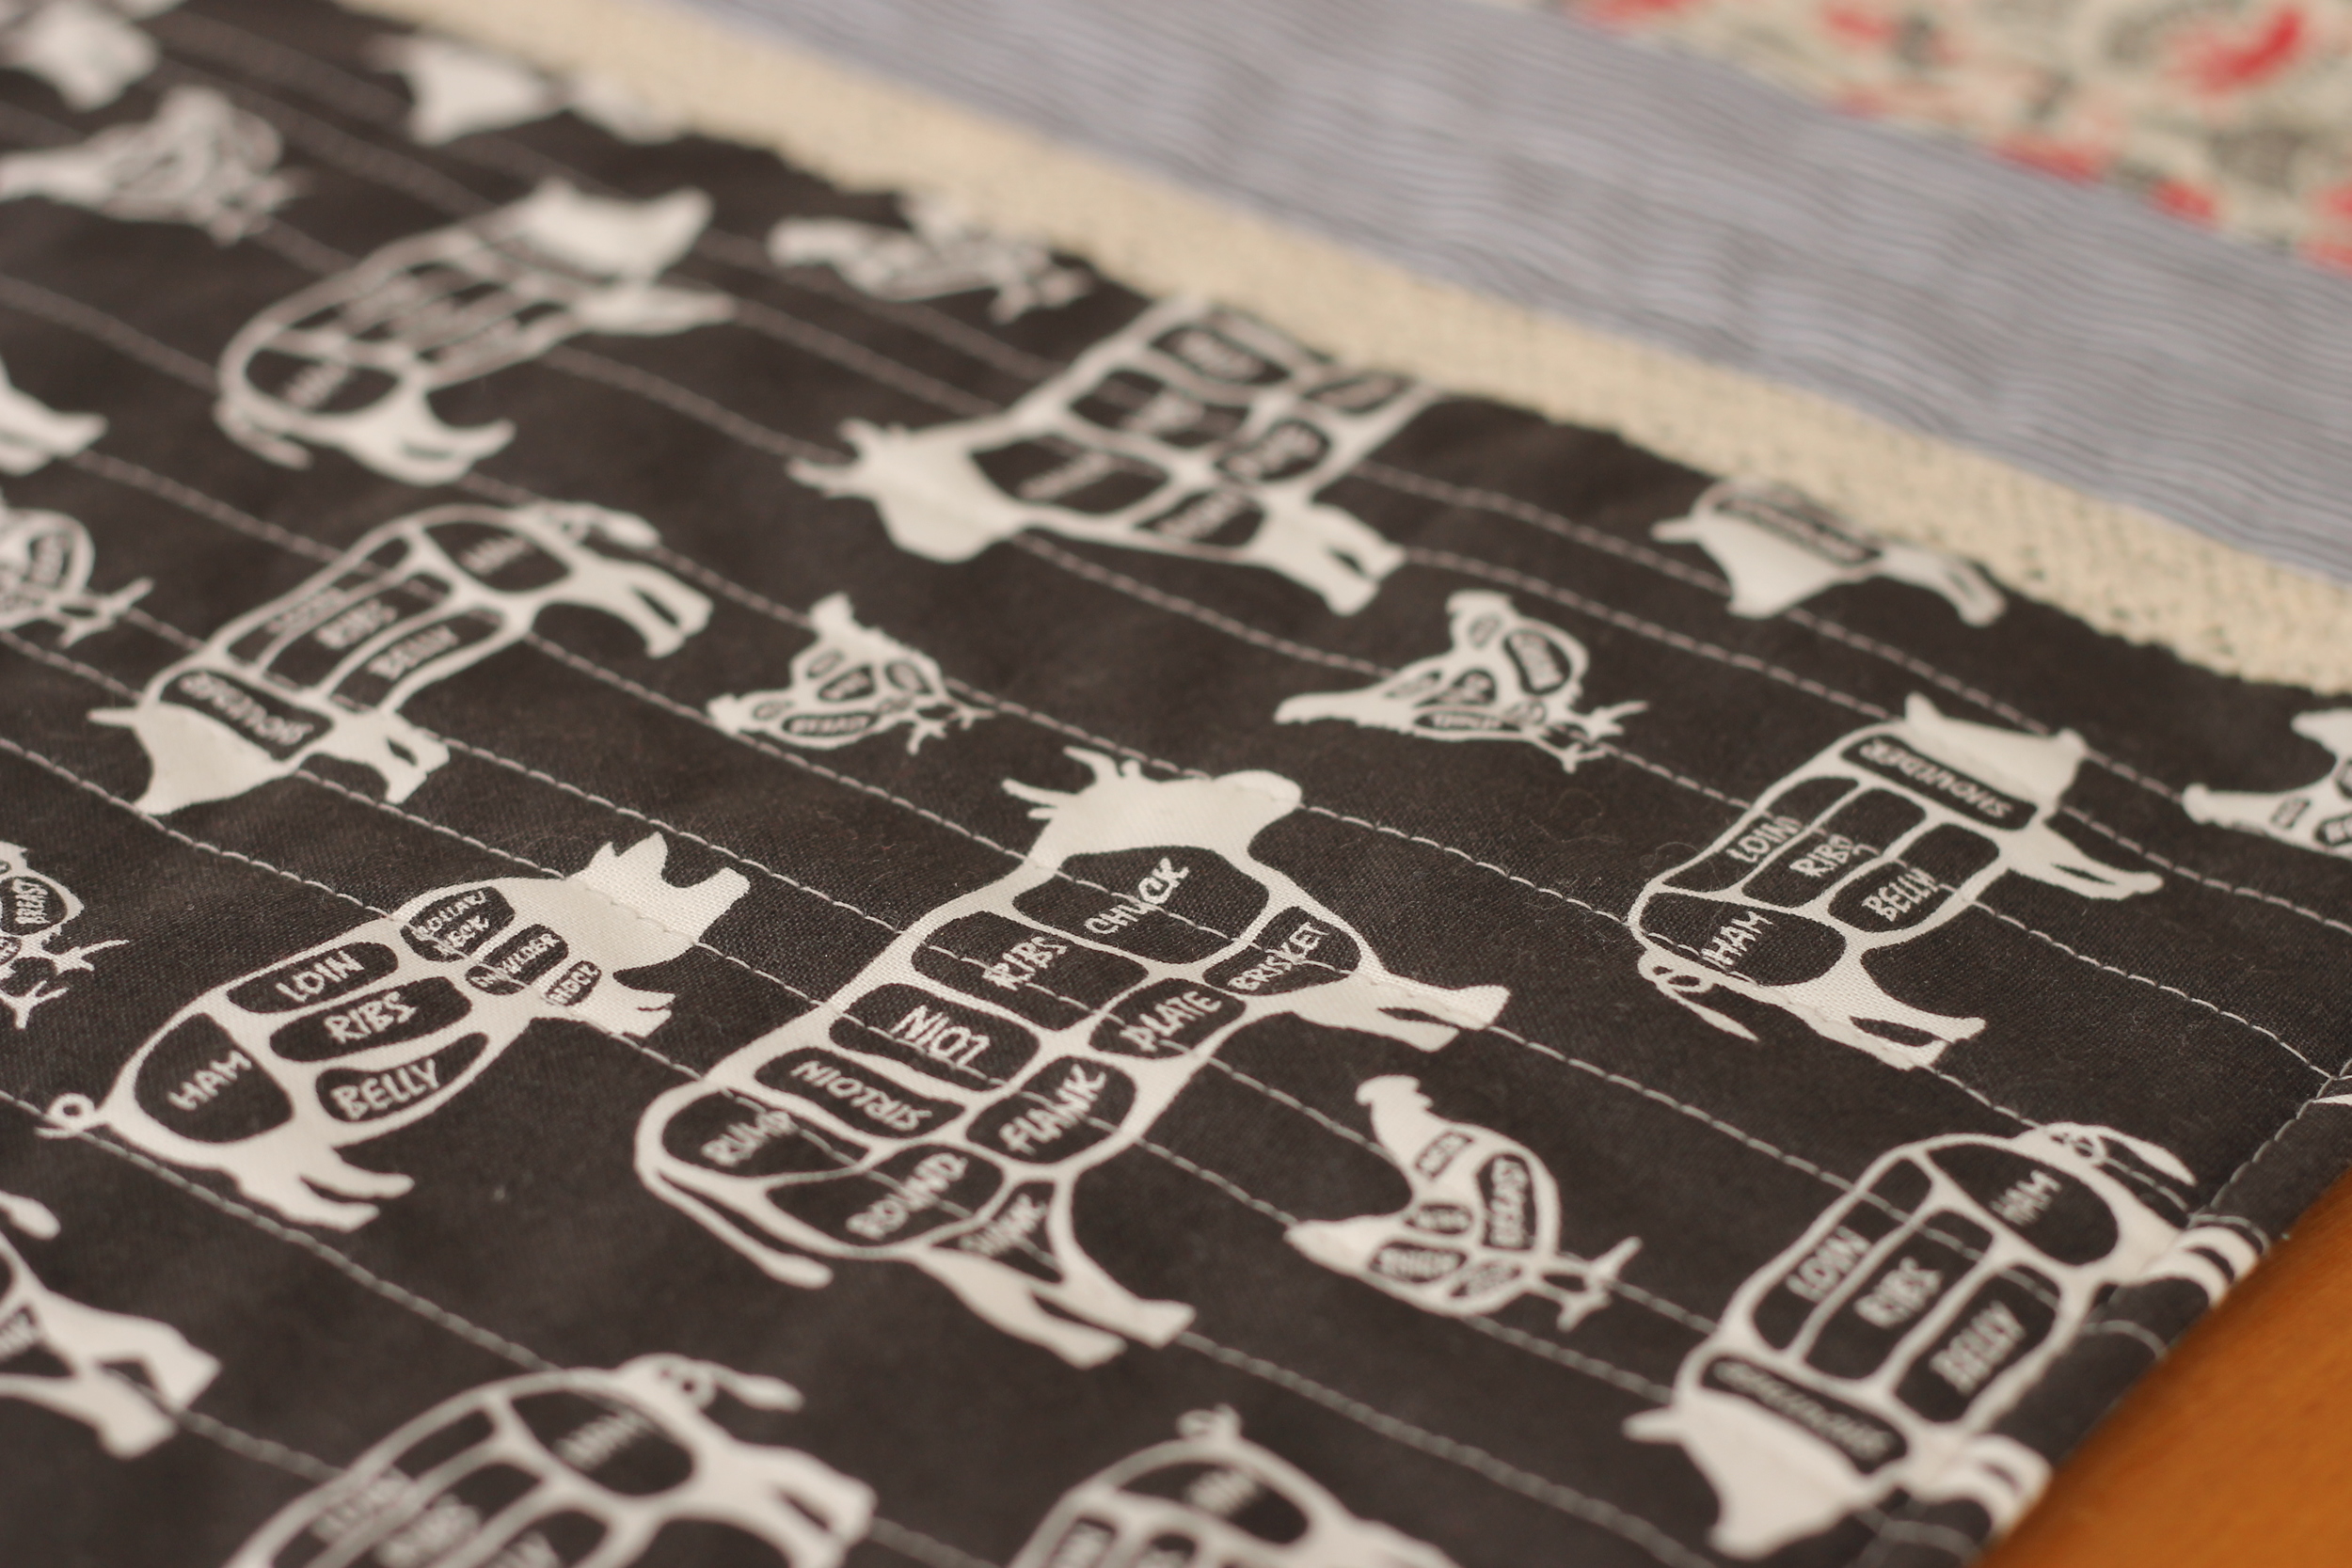
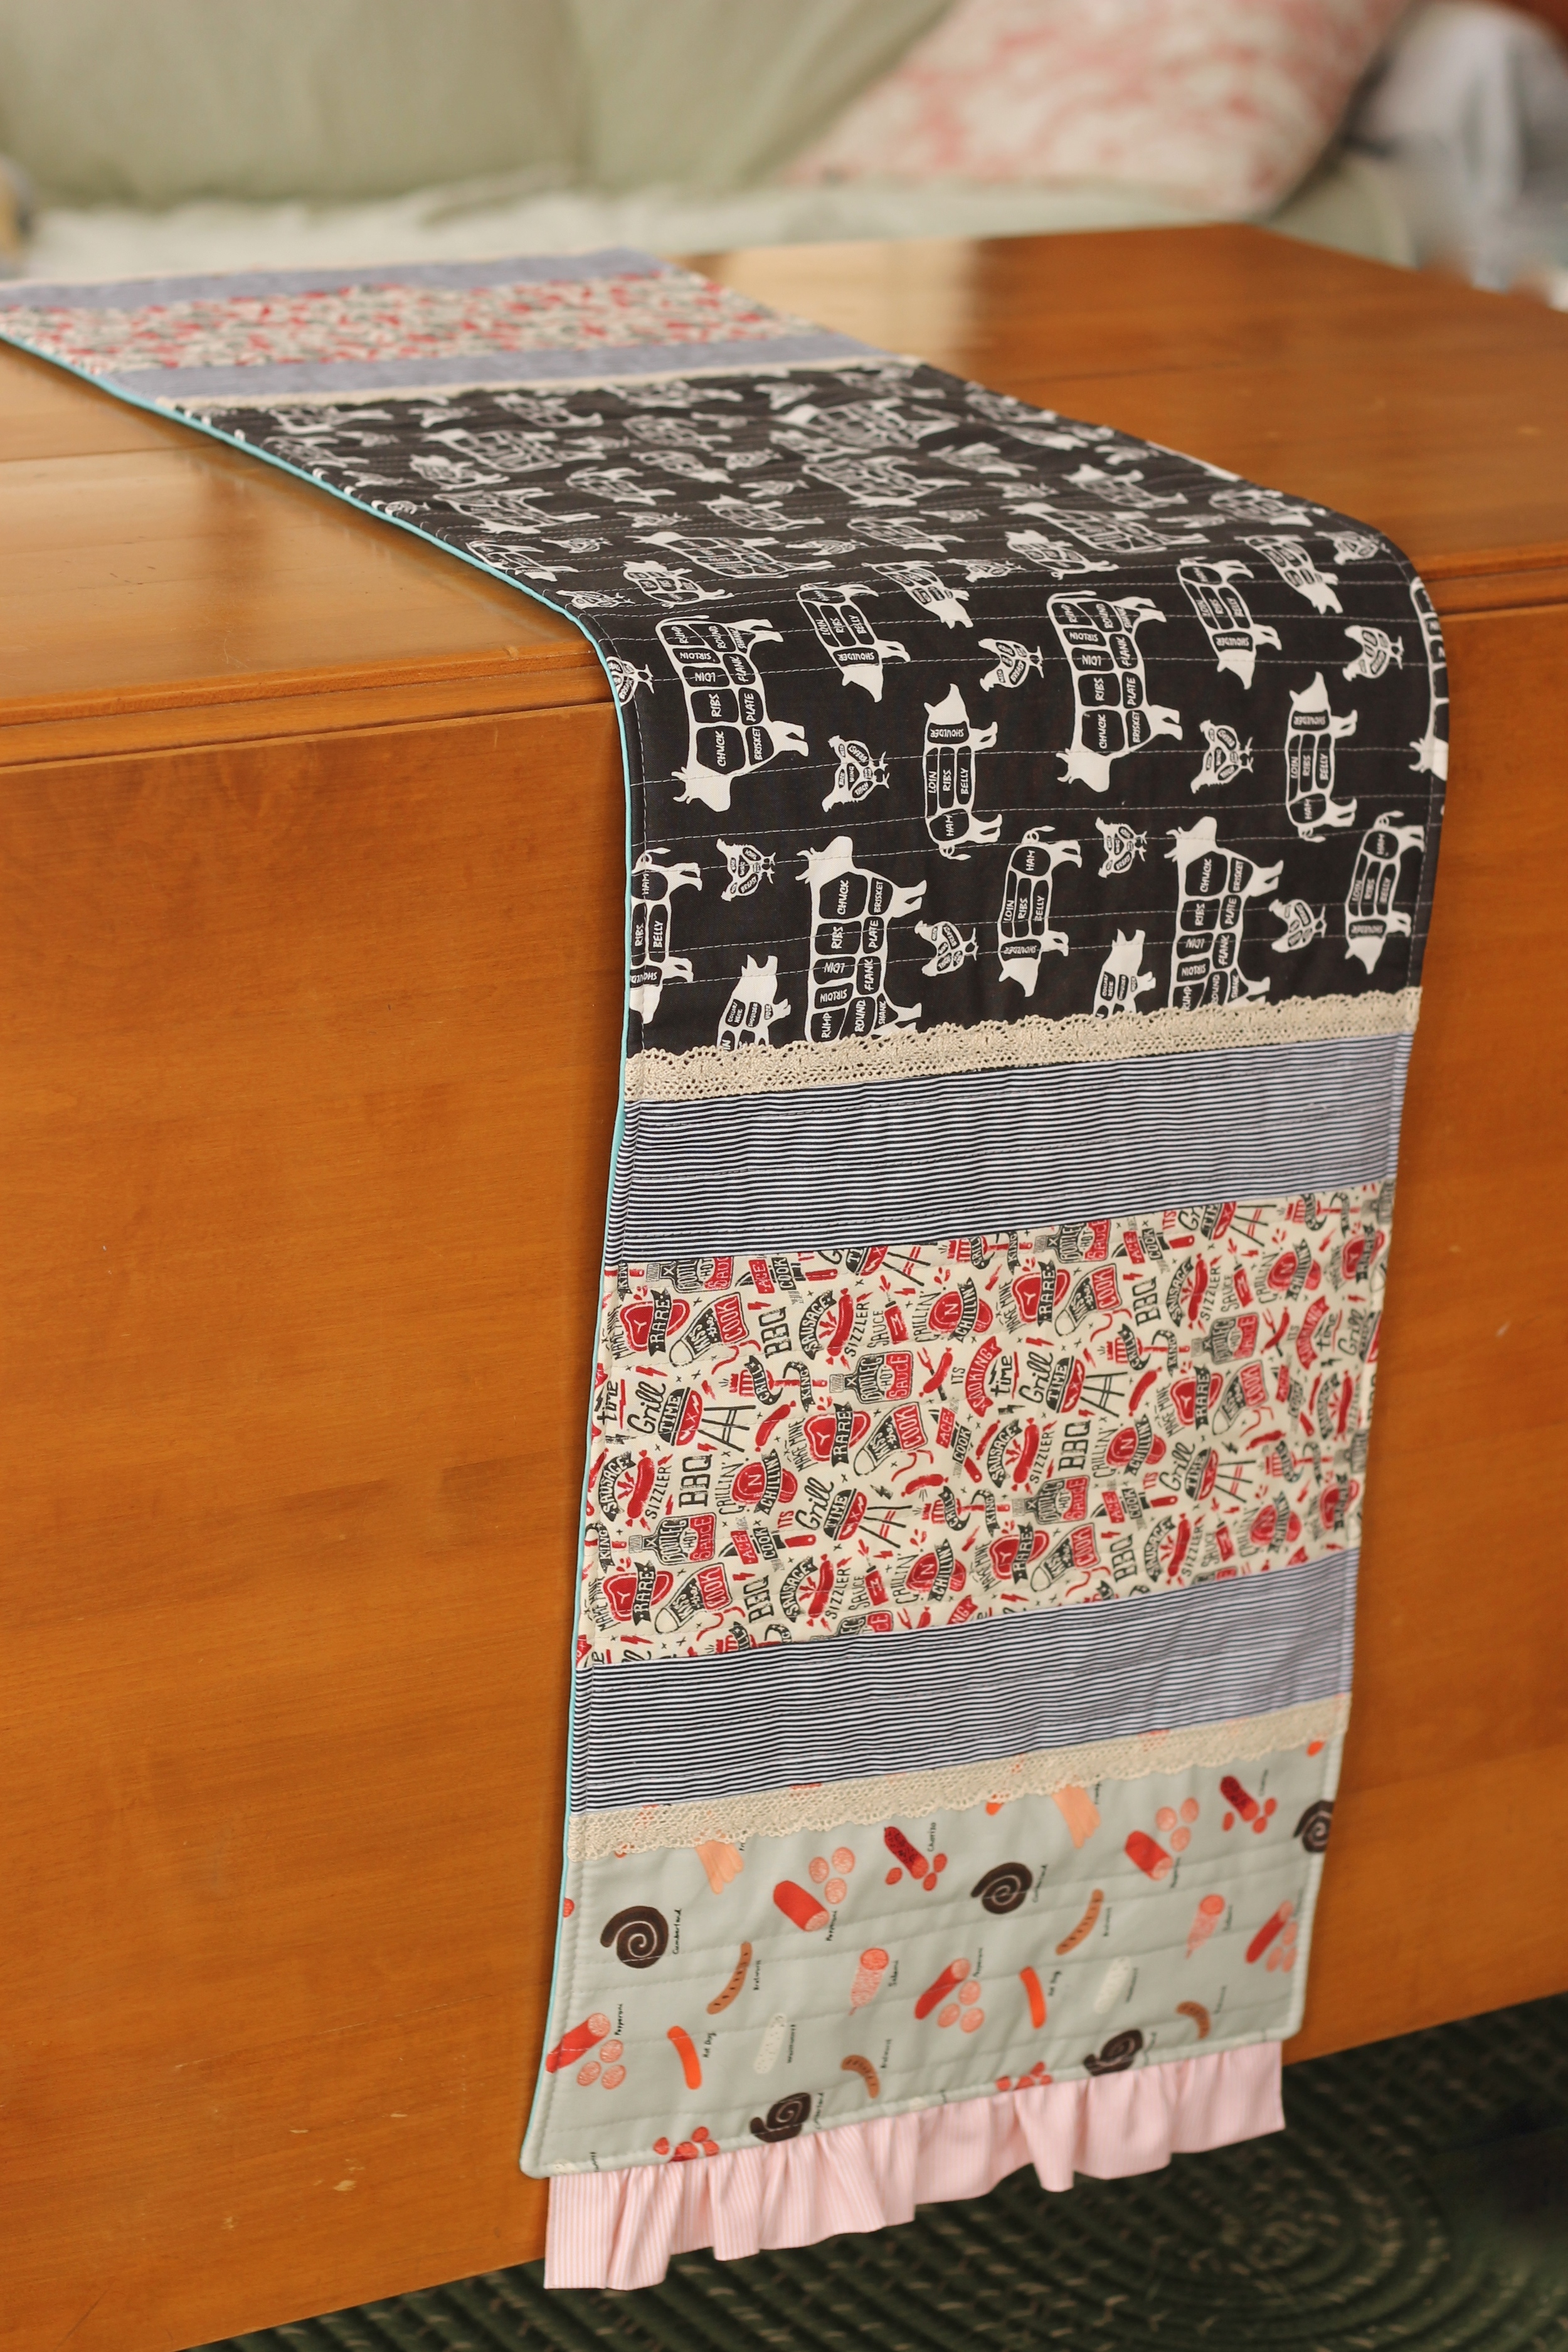
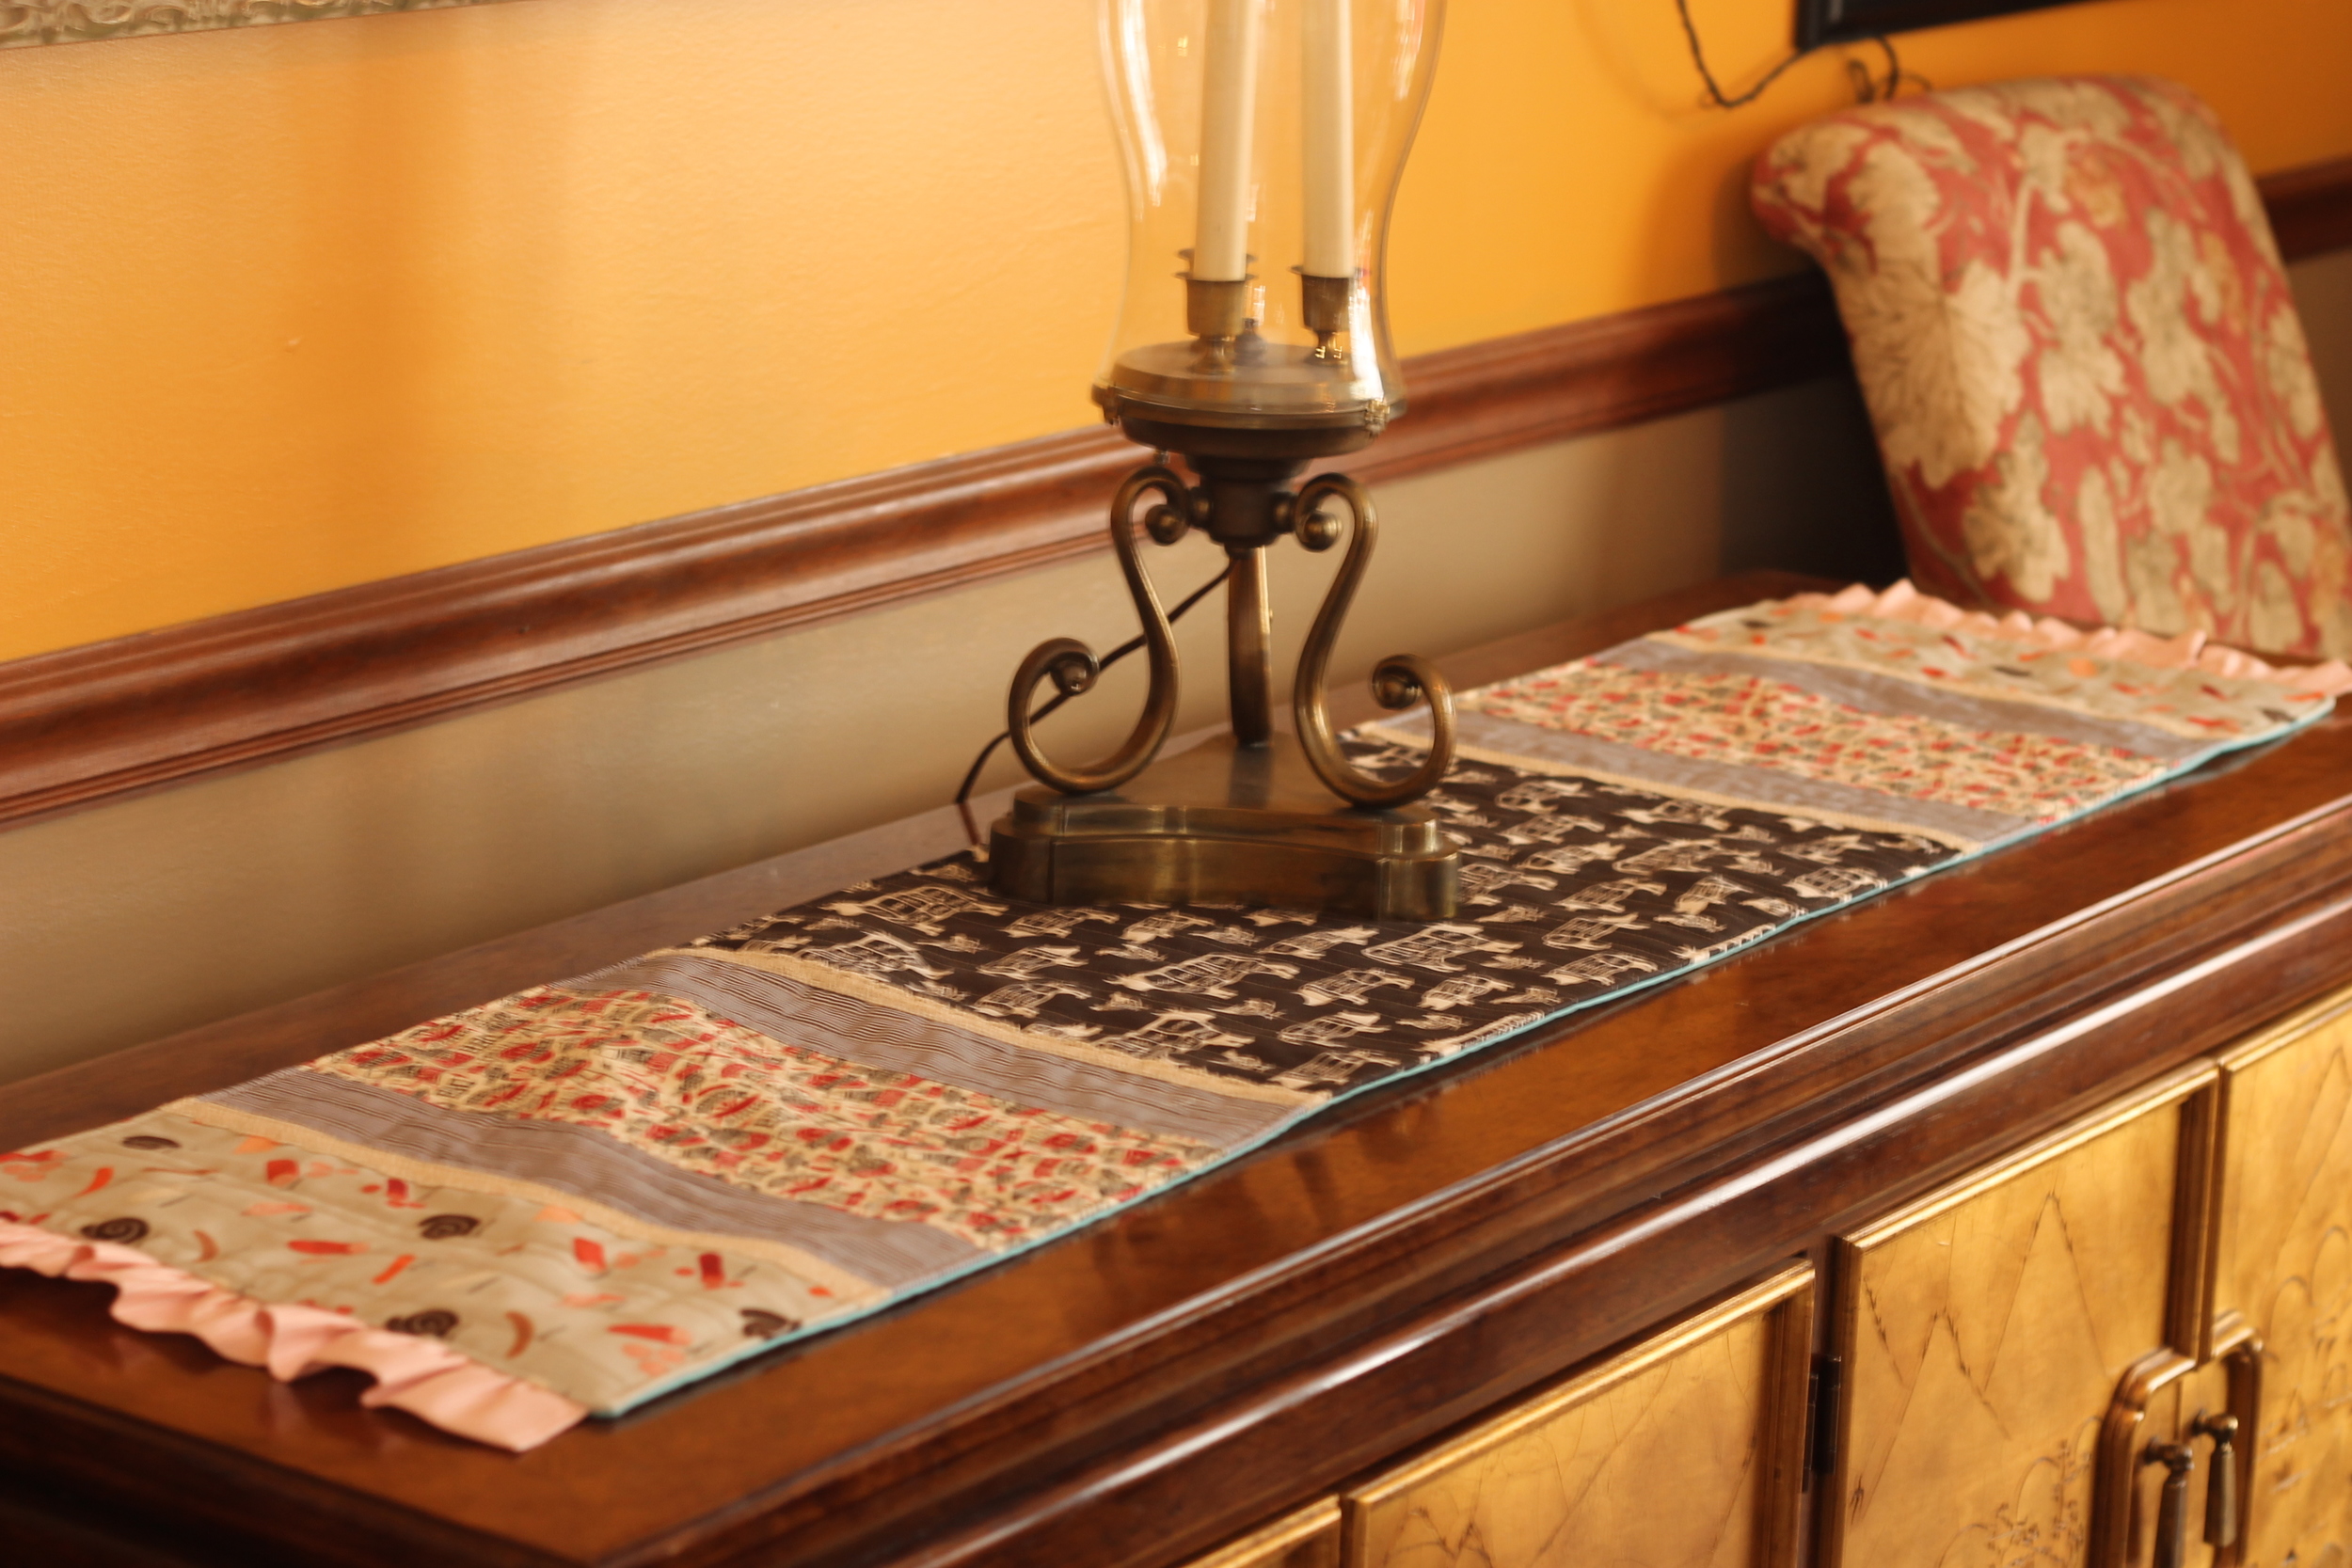
The other day, I posted about the Hearts on Fire Hot Pad tutorial that I created for the Olfa website and today I'm sharing an extension of that. More crafting for the kitchen.IMG_1375 This is a QUICK (because let's face it, I have kids. AKA I have no life of my own so quick finishes are important for me!) but full of personality and cute table runner.

I used more of the Dear Stella, Kiss the Cook fabrics because I big puffy heart this line so much. For this project, adjust your repetition of the blocks or sizes to make a size runner that suits you best.

Kiss the Cook Table Runner - Finished size 55.5" x 13" Suitable for beginners Materials: Batting (I use THIS from the Warm Company) and Backing fabric - 52" x 13.5" strip Fabric:  Center butcher print panel - 21.5"  x 13.5"  - Cut 1 Striped print - 2.5"  x 13.5"  - Cut 4 BBQ print - 6" x 13.5" - Cut 2 Meat print - 6" x 13.5" - Cut 2 Ruffle - 4" x 24" - Cut 2 Lace Trim:  13.5" pieces - cut 4

Instructions:

  1. Piece together the runner top in the order shown below using 1/4" seams. table-runner
  2. To add the ruffle on the end, press both short ends in 1/4" to the wrong side. Then press in half on long side. Stitch the short ends closed. Run a basting stitch 1/8" from raw edge and gather. The ruffle should be 1" shorter than the width of the runner (12.5" in this case). This will prevent the ends from getting caught in the corner when we turn the runner in a later step.
  3. Match raw edges and pin ruffles to each end of the runner, leaving a 1/2" at each end (meaning, the ruffle will be shorter as described above, center the ruffle so that there is 1/2" on each end) and stitch.
  4. Place pieced top on batting and pin in place. Quilt as desired.
  5. Add lace trim and other embellishments as desired. In this sample, lace trim was placed along the edges of the striped print.
  6. With right sides facing, place quilted top on to backing. Pin in place. Stitch all the way around, being careful to not catch your end ruffles in your side seams. Leave a 6" opening on one side for turning.
  7. Turn runner right side out through opening. Steam press edges and top stitch all the way around runner.

IMG_1424

IMG_1422

IMG_1414 IMG_1413

IMG_1412

IMG_1410

IMG_1381

IMG_1379

IMG_1375Thanks Dear Stella for providing the fabrics for this project.


Glamorous Fair Wear - Part 3

I've been sharing all this week a fun refashioning project that I was working on for our county fair with my kids. Be sure you check out part one HERE and part two HERE. You'll find the "what I did" to refashion my big girls outfits...

I saved my favorite for last. Sprout and my husband, The Gardener, competed in the pairs class for the Guys and Gals Lead Lamb show and since we are in the heart of Buckeye country (that would be in reference to THE Ohio State University Buckeyes for those of you not in the know on the scarlet and gray) I choose a sophisticated game day look for the two of them.

I started with this large stash of sweaters from the thrift store. That awesome scarlet and gray striped sweater could not have been more perfect. But it fit me. I wear a size LARGE women's...Sprout wears a size 5 toddler. So getting it to fit was a challenge.

In order to get that large sweater to fit Sprout, I had to cut the side seams and arms. You can see how I did it HERE on this post where I performed the same sizing down on a sweater for her last year.

Here's how I refashioned that pile of sweaters for outfit #3:

  1. I sized down the large sweater to fit Sprout. I added an appliqué using my Bernina 580 to add the text "OHIO" and a little buckeye. (it's a poisonous nut from the Buckeye tree which happens to be the "mascot" for The Ohio State University Buckeyes). What I loved about using my Bernina is that you can adjust the stitch width and length to the extreme detail. For instance, I satin stitched this using a zig-zag stitch - using the turn dial, I can adjust that stitch to exactly what I need. You can go from a stitch length of 3.5 to 3.4, 3.3...and so on. It's a great feature!)
  2. With some of the left over wool sweater pieces, I made Sprout a facinator. It is a HUGE bunch of rolled roses with pearls added to a headband. It got really heavy and I had to add a few hair pins to it to help hold it in place BUT it was so cute!!
  3. THE SKIRT! Oh the skirt! Inspired by a cute skirt I saw at the Country Living Fair this fall, this skirt started with a single wool sweater. I cut it into a very slight A-line, using one of Sprouts other skirts as a guide.  I cut the sweater so that I used the finished hem of the sweater as the hem for the skirt.  I left the skirt at this point, unsewn on the side seams while I added all of the fringe (in other words - it was a rectangle shape).  That fringe is a lot a lot of wool sweaters cut into pieces of various lengths and widths. Then I started at the bottom on one side and just kept adding and filling in until I had the entire skirt covered.  Next, with right sides facing, I sewed the side up to create a tube and create the skirt. Next, I used knit to create the waist band. I added in elastic to the waist band to get the perfect fit. This skirt was so cute on her and had the perfect "twirl" effect

For the Gardener, I found a great wool coat in perfect gray color. On the inside of the coat, on one side, I appliquéd the letters "O-H" and on the other side "I-O". If you are a Buckeye fan, then you know this is a cheer you hear often...when someone says "O-H!" the proper response is "I-O!". So when it came their turn to spin on the runway, he looked at the audience and opened up his jacket, flashing everyone. Ok, not exactly FLASHING but you get the idea! It was hilarious!

Did they win? No. But they did come in 3rd place and they won $14! Sprout was over the moon. She promptly asked if she could spend her money on a funnel cake and ice cream. I love this outfit and it will get a lot more wear this year as we cheer the Buckeyes on! (Ranked #4 currently in the nation....I feel an awesome National Championship title coming this year!)

Have you done any great refashioning projects lately? Share a link to your projects in the comments section. 

Glamorous Fair Wear - Refashioning part 2

I'm sharing this week about my refashioning project from our recent county fair...If you missed the first part, check it out HERE.

One of my peas wanted a casual look for her sheep show...and I obliged.  Although the class says they are looking for an elegant look, I think we compromised with this casual elegance.

We started with a wool tweed coat and a cream colored wool hat.

f

Here's what I did for outfit #2 to refashion it:

  1. Lavender Tweed coat - we added vintage lace to the collar.
  2. I added rosettes  and these flowers made from wool sweaters and felt leaves all along the hem of the coat. Then I added pearl beads and other pretty buttons into the mix.
  3. I made a wool belt from one of our thrifted sweaters. We topped off the knot with a pretty vintage brooch.
  4. All the way down the side seam of her jeans, I fused with Steam-a-Seam, wool patches from our thrifted sweaters.
  5. We topped it off with that cute creamy wool hat I found at the thrift store.

This outfit came together pretty quick. I love the flowers along the hem of the coat and I think this is a super cute way to add some whimsy to an old coat.

The belt was a fail in my opinion. To use the wool and sew it into this long skinny tube and turn it for the belt...it didn't flow right and I wasn't crazy about it. We had to pin it down to get it to lay right.

The wool patchwork jeans were a big hit. My daughter loved the look and they looked cute with her boots! It was super easy to do. The Steam-a-Seam has paper on both sides. I peeled back one side and placed the wool. Cut it out around the patch, removed the other paper backing and then placed it on the jeans seam. I used a cotton pressing cloth and steam pressed the patch. It turned out perfect. I LOVE Steam-a-Seam for applique and patchwork projects like this one.

Do you have any fun refashion projects you've done? Share a link in the comments section! I'll be back on Thursday to share the final project of this group, and it's my favorite one!

Refashion Wool - Glamorous Fair Wear

I've been largely absent from this space. I may have mentioned...I wrote a book. A crazy process that has kept me quiet here while I tinker away and try to keep up with my kids at the same time. No easy task. I'll be stepping back in here time and again with a whole mess of fun projects and tutorials in the months to come.

I've missed sharing and sewing in this space. So, what's new with you?!

Me? Well, since you asked...

The nice folks at Bernina have treated me to the use of 580 machine to use while I work on my book and to try out for a year. It will be hard to let it go next Spring as I have quickly fallen in love with all she can do and with what I am learning to do with all of these features.

I put her to good use this month while I worked away on a refashion project for my Two Peas and Sprout. They participated in a fun show to promote the Lamb & Wool industry at our county fair earlier this month.

It's called the Guys and Gals Sheep Lead. Each contestant leads a lamb around the show ring past the judges and wears an outfit made of wool. They hand off their lamb to the Lamb & Wool Queen and then take a spin on stage while the announcer gives the details about the outfit they are wearing. They are judged on their handling of the animal and also on their outfit.

You can see our refashion project for this show from 2012 right HERE and from 2011 HERE.

This year, my trip to thrift store yielded some great finds for our show. I talked over each outfit with my girls and they picked out their favorites. Funny thing, my pea that picked out this first outfit, in the end, decided she liked her sisters outfit better and wasn't thrilled about hers. Guess who won 1st place? SHE DID! She loved her outfit after that plaque was handed to her!

OUTFIT #1.  I started with this....

An Ann Taylor LOFT long sleeve wool blazer and J. Crew wool pants. The pants turned out to be way too big - more than I felt comfortable adjusting so we ended up opting for an ankle length wool pencil skirt.

Here's how I did it:

  1. I added black lace all along the blazer collar.
  2. I shortened the sleeves to 3/4 length and also added the same black lace at the cuffs.
  3. I removed one of the buttons that was not covered by the lace and replaced it with an antique earring that served as a button and added glamour.
  4. On the collar of the blazer, I neatly folded a vintage lace hanky and pinned it to the blazer with an antique brooch.
  5. We added a simple cream colored grosgrain ribbon around the waist for a belt.
  6. The skirt had been ankle length. I hemmed it to just above the knee. I added a double layer at the hem. One layer of a creamy gray cotton ruffle and then underneath the cotton, a layer of the black lace that was the same as the lace used on the blazer collar.
  7. We embellished her skirt with a trio of rosettes made from wool and layered on top of lace and pleated satin.
  8. Her final accessory was her headband that was made from one of our thrifted wool sweaters and edged with lace trim.

It took me a total of about 2 hours to play around with the design and then implement it. My Bernina was a work horse with this wool fabric. She didn't hesitate a bit and handled these super heavy duty layers on the blazer with no hesitation.

(I only wish I had a better camera than my circa 2001 Kodak Easy Share 4mp (yes, FOUR MP) but I think you get the idea.) Refashioning is fun and affordable and I'll tell ya what, it sure satisfies my creative side. I really enjoy it.

I'll share more on Tuesday this week about the other peas outfit plus the outfit I made for Sprout that was a big hit! Here's a teeny sneak peek!

Are you a refashioner? Share in the comments links to your refashion projects!

:: Button Loop Tutorial ::

It has been BEYOND insanely busy here at the Two Peas studios in the last year. Many new projects and lots of exciting plans...one of those plans was hiring an intern.

My desire in wanting to give back and work with students in a learning environment led us to attend the Career Fair at our local art college where we met La-Neka. She has been learning all about the business and doesn't even bat an eye now when I tell her we need to go run an "errand" (which is code for ice cream run in town). She has put together a great little tutorial for you below. Please take a moment to say hello and wish her best wishes as she continues in her fashion design career.

Here she is in her first blog post...a button loop tutorial. Great for using on bags, garments and more.

 Hi, You are probably wondering who I am. I am the new intern at Two Peas in A Pod Homegrown Designs. I am a student at a local college in Ohio and I am studying fashion design. I have made a few Tutorials and I hope you like them.

-La-Neka

Loop button holes

Materials

  • Scrap fabric 12"x12"
  • Thread

Directions

1) Cut 1 piece of fabric 5 ½”x 4 ½”

2) Cut 2 strips of fabric that at 2”x 1 ½”

3) Take the larger piece and fold the long side under ½” and press. Set aside.
4) Fold one of the short pieces in half long ways with right sides together and stitch a ½” seam. Back stitch at both ends.
5) Cut the seam with in half leaving it to measure ¼”.
6) Turn the tube to the right side and press flat.
7) Lay the piece vertically flat and take the top end of the piece and line it up beside the other end. It is like wrapping a scarf on some one.  It should have a kind of looped point at the top. Iron it down flat to create a point at the top. Set aside.
Repeat steps 4 through 7 to make the second loop with the second short piece of fabric.
Take the larger piece and unfold the seam.
On the backside of the looped pieces there is a small triangle at the top. Place the piece back side up. Line up the edges of the loops with the edge of the larger piece where the fold is. Pin it into place.
Sew along the folded edge, ½” seam in, and backstitch over the loop seam.

Button looped pocket - putting your button loops to good use

Materials

  • Sample made from button loop tutorial (see button loop sample)
  • Fabric 1
  • Fabric 2
  • 2 buttons the same size (1”)
  • Thread

Directions

Cut one piece of fabric 1 measuring 4 ½” x 5 ½

Cut two long strips. One for the lining and one for the exterior.

Stitch the pieces together with right sides together leaving one of the short ends open. Backstitch with a ½” seam on each side of the fabric.

Turn the pocket to the right side and press the seams evenly.
Press under the top that was left open with a seam allowance of ½”.
Fold the piece in half so that the short end that is open is lined up with the other short end. Wrong sides together.
Topstitch the side edges with a ¼” seam. Press flat and set aside.
Take the button loop sample and the short cut piece that is the same size as the samples beginning size and place it on top right sides together and stitch it on ½” seam on each side accept the opposite end of the button loops. Turn it to the right side and press the seams evenly. Take the open end of the button loop flap top and slide it into the pocket piece’s opening ½” down and tip stitch it into the seam. Press the seam flat. Flap the top of the button loops over evenly lined up with the pocket.
Make a mark where the loops are through the loop, make a dot. This is where your buttons will be. Flip it back and sew your buttons where you made your mark.
Now you’re all done with this great button looped pocket. Add a plastic bag and make it for snacks or store your safety pins in it.

 Great job La-Neka!


: : me and Jo-Ann : :

Yeah.  SO...a long, long time ago...I was asked to design a few projects using the Simplicity Deluxe Bias Tape machine.  And I came up with a a few things including this simple patchwork bag.  Haven't seen this bag in a long time.  Until tonight.

Searching for something else on the internet and I stumbled upon my old bag.  As a free project on the Jo-Ann fabrics website.  YEA!  I wondered when it would surface and be shared and now I'm uber excited because it's a freebie for you all to enjoy.

SO...enjoy!  Would be super cute in bright Spring fabrics for you to carry once the snow melts!

{thanks Jo-Ann's and Simplicity!}

: : handmade gift giving ideas from two peas : :

photo of Christmas Stocking Pocket banner

Just some ideas from my stash to share with you if you're still working on gifts (or like me, just starting, literally...to make and shop).  My tutorials page has  handbags, accessories, fun household items, thrifty makeovers, refashions and more.  A few are videos and I think you'll enjoy them.  So, hop over and visit my TUTORIALS page and find something you love to sew up!

If you make something from my tutorials - drop me a line and share!  I love to see what you craft up!

Now...I'm off to sew!  Earwarmers, scarves and new Hazel Hipsters ...my Two Peas gave me a wish list!

Want to sew with me?  Save 25% right now through December 21st, 2012 ($20/ each) on either of my video courses - The Tie Tote or The Hazel Hipster - 2 of my most popular patterns.  They go together quick and the videos are wonderful because it's like having a private lesson in your home.  (discount given via paypal refund after puchase).  Buy both classes and save even more - purchase both classes and save 35%.

Happy Sewing!


: : decking the halls : :

Striped drapes hanging at large window

One thing I don't own is a decent camera.  I'm cheap.  Good cameras are expensive.  And since we are now like most Americans, barely getting by with a huge increase in our health care payments, groceries and gas...well, iphone pics will suffice.  Once in awhile I throw in the old Kodak Easy Share 4mp camera...yes, I know.  Someday...someday.

So...in my desire to prep our halls for the holidays, I had purchased some neutral fabrics to make drapery panels.  I have always had valences hanging at this large window in our living room but I was ready for a change.  They were so outdated.

I wasn't sure if I was loving the stripes at first but now I love them.  Love, love, love.

Here's how I did it.  First, I measured from the curtain rod to where I wanted them to drop then I added in seam allowances plus 2".  The math got tricky here.  I had to figure out how many stripes did I want, how big they would be, add in the seam allowances, etc...I suck at math.  Truly, I do.  But with some trial and error I got to the point of a workable number and got to cutting my panels.  I have a very wide window I was covering and I knew I would never close these drapes so I made panels that were much narrower than my window thus saving on fabric and $$.

striped drape panel

Once I got my two panels pieced, I lined them with a bed sheet.  I bought a queen size sheet set and it worked perfectly.  Right sides facing, I sewed all the way around leaving a gap towards the top for my curtain rod plus an opening for turning the panel.  Turn the panel right side out and press.  I used steam a seam to close my opening where I turned the panels.  Then, I went back to where the gap is for the curtain rod and sewed across twice - large enough for my rod to fit - creating a casing.  Repeat for your other panel.

striped drapes hung at window

Voila.  Pretty simple.  Quick.  Cheaper than store bought (but still a little pricey in my opinion).  They brightened up this old room and gave it just the right punch for the holidays.

No pattern needed.  Just your math skills and some creativity.  You can do this, I promise!

: : bolero refashion : :

I think this may be my new favorite thing for Sprout and I'm pretty sure I need to make one Mommy size.   Let me show you how easy it is to make a bolero jacket with ruffles!

ONLY CUT YOUR SLEEVE LENGTH, OVERALL SWEATER LENGTH, AND SIDE SEAMS. DO NOT CUT ALONG THE SHOULDERS - I just realized the dotted lines run up the outer edge and shoulders - duh!  Don't cut there or along the v-neck! Leave the v-neck intact for now.

So, there it is.  My bolero refashion with ruffles.  It seriously was super easy!  Go forth and thrift, refashion and sew!

: : Weekend Crafternoon - home sweet home makeover : :

This past Spring, one of my friends asked if I would help her surprise her neighbor with a little home makeover.  The Gardener and I were delighted to help.  My friends church came in tore out the carpet in the lower level revealing amazing hardwood floors that got shined up.  They painted the walls too with a bright clean white and one accent wall in a Tiffany blue that was amazing.

The stars aligned for this project.  I wish I could show you ALL of it but we were so busy working I only got a few pictures.  I can tell you this...Mostly what we learned from this project is that a little spray paint does wonders!  But you probably already knew that!

Another set of friends of ours had recently gotten married, combined households and were unloading some furniture.  We were able to snag some pieces to put into the house and give the neighbor a few new items.  Ok...maybe more than a few.  What a blessing!  The best part was we added a dining room table into the kids play room to give them a crafting / homework station that didn't exist before.

Giving furniture new life is so much fun!  One of the old desk chairs got a facelift...some new blue paint and a new seat cushion.  She looks just lovely at the neighbors new computer desk, don't you agree?  The desk was one of those dorm room laminated style desks which is like a plastic coating.  Great for a college kid but we added some plastic appropriate spray paint in white and blue.   It refreshed that old desk for a perfect spot the kids can sit to work on the computer.

By far, my favorite piece of the day was the old lamp table.  My husbands best buddy owned this lamp, big chunky wood and it had these...kind of awful... looking coasters on each corner that were adhered into the table.  As soon as I saw it, I knew exactly what I wanted to do with it.  I LOVED how it turned out and I was so excited to hear that this was the neighbors favorite part of the house makeover.  Swoon!  The bright yellow and zebra shade were perfect together.

I was given the task to redo / create new pillows for the living room.  Here are a few of my favorites.  The first one here, I used some home dec fabric from Anna Maria Horner and added felt leaves that trailed across the pillow along with a felt flower.  I sewed a bunch of buttons to the center of the flower.  Each pillow I made, I rounded the corners and also made an envelope style closure back.  (envelope style is the fastest / easiest style and since I had a stack of pillows to make...that made my job go by with ease).  Round your corners?  Yes...otherwise you end up with these dog ears that don't fill out.  Just a tiny rounding of the corner will resolve that problem.

A familiar and much loved style...a pennant banner with the added word LOVE stitched into it.  Using a disappearing ink pen, I drew the lines for my banner and the word LOVE.  I stitched using a stitch length of about 3.5 with black thread and went over each line at least twice.  I raw edge appliqued the banner flags - stitching a straight stitch just along the edge.  I made the pillow a little bit large and then using a decorative topstitch, went all along the outer edge.

This Sis Boom print paired so well with the bright red poppies.  Layering felt circles on top of one another and adding a black button center plus a line of stitching for the stem created this field of poppies on this pillow.  So bright and cheery!

We worked really hard for about 3 days on this project.  Sewing.  Painting.  Cleaning.  Moving.  Blessing a sweet family with some sunshine.  I can't wait to make a few of these pillows for my own house...maybe this "crafternoon".

Weekend Crafternoon is a new feature I'll be sharing regularly on my blog.  Sharing some fun weekend crafternoon projects to inspire you and I hope you'll join me.  I'll be opening it up as a linky list so that you can share your crafternoon projects too.

Now...I'm off to sew! (4H judging this week!  The peas STILL haven't finished their dresses!  Wish us luck this week!)


: : schoolhouse clutch : :

slowly easing back into things...I have a literal mountain of work, laundry and thank you notes before me.  Catching up is the name of the game currently.

 Over the weekend, I had fun sewing up a quick sample for our Schoolhouse Clutch Sew Along.  It's not too late to participate - just grab a copy of the pattern from your favorite retailer or from our shop and join in.

Since I posted about the sew along early in February and then went on hiatus with 24 hours afterwards (see February post...spent with family) we lost out on promoting this sew along.

BUT if you participate, I promise I have something fun just for you!  Send me a copy of your receipt showing me you purchased the Schoolhouse Clutch pattern and I'll send you the link for the private post on how to add an easy zippered pocket to the inside of the bonus mini-journal included in your pattern PLUS a few little design tidbits.  And there may be more...just saying.

Take a moment and say hello if you will...I always scratch my head in wonderment at the number of hits this blog gets vs. the number of comments that are left.  Hello?  I'm real, not a robot...and I'd love to connect with you and get to know what you are crafting up.  Introduce yourself...I'm so glad you are here.


: : flower accessories - a tutorial : :

Making these little flowers is really very simple.  And with literally a bazillion ways in which you can use them, embellish them, mix and match them...you will have endless combinations you can come up with for any and every occasion.  Use them in :

  • Headbands and hair accessories
  • Brooches / Pins
  • On your handbags
  • Wear on your jacket / embellish a scarf
  • Sew them on your mittens
  • Stitch them onto a baby onesie
  • Make them into a cuff bracelet
  • Stitch them into a quilt
  • Glue them on a pennant banner
  • Pin them to a winter hat, newsboy cap, your ball cap

Shall I go on?  Here are a few I made up this morning for a friend of mine and her 4 girls...

And more I made up over the summer that we used in a photo shoot.

Here's my video tutorial.  AND my cautionary notes : :

PLEASE BE CAREFUL!  THIS INVOLVES FIRE - HEAT - OPEN FLAME - DANGER WILL ROBINSON, DANGER!

Ok for serious, please be careful.  This really isn't something for you and your little kids to do together.  Exercise good common sense and for heavens sake, please be safe!

http://youtu.be/QWCk9HJuc-Y

{love on a limb}

L.O.V.E.

I'm not a quilter.  Not even close.  Although I do quilt.  I really don't consider myself a quilter.  But I love quilts.

L. O. V. E.

I cheat at quilting.  A lot.  Blanket quilts...that's more my speed.  Instant gratification.

My Love on a Limb "quilt" has been used in so many ways.  For awhile, I used it on a table top.  But for at least a year, it has graced the center back of our family room couch.  I love it.  Sprout often uses it to cover up with as it's just her size.

The fabrics I used were from Moda / French General along with some others thrown in the mix.  And Moda has some really great selections that would work well for this project.  My favorite right now is Sweet Water - Authentic line.  Check them out at your local quilt shop.

Go Sew!  Make  something for your love this weekend - check out this tutorial for my Love on a Limb project.

{be my valentine - a tutorial}

Last year, about this time, my peas and I sat down to this sewing project.  If your son or daughter is begging you to teach them to sew - here is an easy peasy project they can wear.  They will love telling everyone they made it themselves (ok, no, I doubt a boy will wear this BUT wouldn't he love to give this as gift to his best girl from down the street or maybe a teacher or his sister, etc!  Boys need to learn to sew too - I firmly believe.  Both my husband and my Dad are competent sewers).

This is also an easy project for you!  With a blank tee and some strips of scrap fabric and about 30 minutes, you can create a super cute Valentine tee (and hearts you can wear all year round - not just for Valentines).

To start, you will need 2 strips of fabric cut 1 3/4" wide x 68" long and 1" wide by 68".  The length may vary based on how big your shirt and thus, how big your heart is but that length should be a pretty good fit for all.

If you don't like the look of raw edges, you can serge all along the long edges of your strips (or use a zig zag stitch) to finish the edges.

Next, layer your strips together and using your ruffler foot OR a gathering stitch, gather your strips.  I did a gathering stitch on mine using a stitch length of 6 and set my tension at 6.  The higher you set your tension, the more gathered in will be.  Looser tension, looser gathers.  Adjust to your preference.

Next, we are going to draw our outline of the heart on the shirt using a disappearing ink pen (you could also use chalk if you'd like).  I did not use a template but rather, freehand drew my heart.  You could always fold a piece of paper in half and draw half a heart on the fold and cut it out to create your template (remember doing that in school?).

Now, pin your fabric ruffle along your heart outline.  I started at the top center and folded under my end.  I also put a book inside the shirt to make it easier to pin so I wasn't catching the back side of the shirt.

Stitch right down the center following your gather stitch.  That's it kids.  Simple.  Cute.  And your kids can do this themselves.

Since the ruffles are 1 3/4" wide and sewn in the center, when you go to wash this - just a heads up, in the dryer, your ruffles are gonna go wild and not lay flat.  SO, you may want to finger press your ruffles down when it comes out of the wash and air dry your shirt.  OR you can follow this idea from the shirt my Two Peas made last year.

This is the shirt my peas made last year using a single strip of fabric cut 1 3/4" wide.  They ran a gathering stitch down the center and then pinned the fabric to the shirt.  Instead of stitching down the center, they stitched along both edges as you can see in the photo.  That way, the ruffles stay put and the look nice when you throw the shirt in the dryer.

Sprout LOVES her shirt (she's napping right now in this outfit in fact - won't take it off).  She's also a big ham.

Happy sewing and sharing the L.O.V.E.

{sew inspiring - "sew can she"}

A new year, a new look to my Monday Morning Inspiration posts.  Calling it now "Sew Inspiring" where you can meet some of the very inspirational crafters, sewers and artists right in your own neighborhood.  Or in the next state.  Or across the ocean.  You get the idea.

Join me on Mondays to meet some inspiring artists.  Want to be featured?  Just send me an email...twopeasinapoddesigns at gmail dot com.

It is my pleasure to introduce to you today, the adorable Caroline from Sew Can She.

Sew can she{Since the feature is called Sew Inspiring, can you tell me what inspired you to sew all the time and then start SewCanShe.com?}

It’s funny how life leads you in ways you would never expect. I cannot remember ever not sewing, I guess my mom taught me that young. My sewing machine got packed away for college however, and then I loaned it to my sister for a while. It wasn’t until I had babies that I decided to start sewing again. But then, I might have cracked had I not had sewing to escape into for a while each day. It was like I could sit down at the machine and my worries would fall away. It saved me. Then I started making pdf patterns and a little company started. But eventually I knew what I really wanted to do, and that was make a site where people could be surprised, delighted, and excited each day by a new sewing tutorial. And, where I could help all those great tutorials out there get noticed!

{What continues to inspire you each day and how do you keep your art fresh? Inspiration each day}

My daughter Chloe is my inspiration. She’s only 6 but she has more creativity in her little finger than an entire Hobby Lobby store!  Really. I know you don’t believe me, you think it’s just the mom in me talking, but she blows me away. Someday she is going to really make something. I don’t know what yet, but you just wait and see.

{What 3 words best describe you?}

Dorky, creative, and stubborn. :)

{What could you not live without to get through each work day?  Your phone/computer, sewing machine or your coffee?}

I know I should say computer because I am on it so much, way too much. But I have such an emotional tie to my sewing that I think I would die without a sewing machine.  You’ll never catch me lovingly oiling and talking to my computer, but my sewing machine – all the time.

{What is the best part of your job as a designer?}

This is easy.  Being a part of the online sewing/blogging community.  All of the sewing, blogging moms and grandmas I have met have been so cool, so sharing, and so real.

{What advice would you offer to someone when it comes to living a creative life?}

Find what makes you happy. What makes the stress melt away. And what gives you a chance to share with others. Creative doesn’t have to be sewing or painting. It could be building robots.

{What can we expect to see from you in the coming year in terms of new projects and design?}

Funny, just today my sister said to me ‘the ideas you have next year will be completely different from the ideas you have today.” I hope that’s true. I don’t want to ever get stuck focusing on the same thing for too long. So, we’ll just have to see!

Thanks Caroline for a peek into your inspiring self!  Be sure to visit Caroline at Sew Can She for great sewing ideas everyday.

{Christmas stocking pocket banner - a tutorial}


Christmas Stocking Pocket Banner - I wanted to come up with a cute decorative item that we could make into a fun activity with the kids.  The idea behind this banner is that the pockets will hold scripture and notes from us to our kids along with something fun like a piece of candy.  I made this banner to have 7 pockets - one for each day of the week but you could also make a smaller version that includes one pocket per child and refill each pocket every day.  You can fill both the little stocking plus the bigger pocket.  Bonus!

I decided I would have one for each day of the week and fill it a week at a time.  I'm hoping their excitement will be contained and they will keep themselves from looking ahead into the next days stocking pocket...I'll let ya know how that goes!

This is a great project for using up some of the larger scraps you have in your stash.  You could also use fat quarters but I really try to use what I have on hand and use up odds and ends to save money.  I also used on this project a flat sheet that I purchased at a discount store.  I used that for the back of the pockets which is a great way to get a lot of bang for your buck.  Even a pretty Christmas flannel sheet would work well.  Check out your local quilt shops too because I have seen some killer deals on seasonal fabrics!  (if you know of any good sales - list the links in the comments section!)

Materials:

A stack of scraps or fat quarters to create your stockings and pockets - the amount depends on how many pockets you are creating.  1/2 yard of lining fabric, 1/2 yard of pocket front fabric is what I roughly used.  Plus my scraps for the stockings.

You will also need ribbon or other fabric scraps to create some ruffle embellishments on your stockings.  Get creative here!  Embellish with ribbon, ric-rac, lace, textured fabric from old clothing scraps like wools, etc.

 And you will need bias tape for hanging.  I again, used scraps of ready made bias tape I had on hand and patched them together.  You can also make your own bias tape but cutting your scrap fabric 2" wide and pressing each long edge in towards the center and then in half again. 

1)  To start, click on the pattern and print it out.  It has been designed to fit perfectly on an 8.5" x 11" sheet of paper.  I found that when I went to print this direct from the photo from the blog post, that I needed to increase the size to 125%.  You can see that the pockets are the size of a sheet of 8.5" x 11" paper - simply place the corners to the bottom of 8.5" x 11" sheet and cut the corners rounded out as shown on the pattern.  Those bottom corner pieces should fit perfectly to the bottom corners of your sheet of paper with 2 1/2" of space between them along the bottom.  Make sense?  You will need to cut 2 per pocket - a front and a backside of pocket.  I used nice fabric for the front and just an inexpensive cotton sheet for my backside of pocket.

2) Cut your stockings out using the pattern - cut them all facing the same way.  Your stockings should be about 8 1/2" tall from the longest points.

3)  Pick out your embellishments for each stocking.

4) Next, embellish your stocking.  Leave them raw edged (remember, I'm a nap time sewer and frugal - no lining these guys.  Leaving them frayed and vintage looking).  I used ribbon on all of mine to make it quick and just gathered them by hand and pleated and created ruffles.

5)  Press under the top of your outer pocket 1/4" and then again about 3/4" - 1".  Topstitch to hold in place.

6)  Pin your stocking on to the front of your pocket.  I used black thread and stitched multiple times haphazardly along the edges (DON'T sew across the top - leave it open so you can stash little treats inside.) to attach my stocking. 7) Lay the front of your pocket onto the backside of the pocket with right sides facing, pin and stitch.  Clip your corners.  Say what?  That means all along the edges that are curved, use your scissors and carefully, cut a slit in the fabric but DO NOT cut into the seam.  This helps to let the item pull and then lay flat instead of puckering along those curves.  Turn your pocket right side out and press your seams.

**NOTE**  When I'm piecing something like this together, I use a stitch length of about 2.5.  I also will use a fresh universal needle for a project like this.  FRESH because each time you sew - you dull your needles.  If you wait to change out your needles until they break, chances are you are pulling your fabric and distorting it some by using a dull needle.  SO change them out frequently.  When I topstitch, such as I did when I attached the stocking to the pocket front, since I was doing multiple lines of stitching and doing what I consider a decorative stitch method, I moved to a stitch length of 3.5.

8. Because our pocket is lower than the backside, it leaves us with a bit of a raw edge showing along the edge on the backside pocket - I simply just tucked it under a bit and gave it a press.  When it goes into the bias tape, that will hold it in place.

9) Last, to finish up our banner, use your bias tape to attach the pockets all together.  Leave about 14" at the end for tying it up.  Start placing your pocket into the bias tape.  Place your pockets 2" apart along the bias tape.  Obvious maybe but just to clarify, open up the bias tape and place the pocket in the center (just the backside of your pocket will reach into the bias tape), pin and stitch down the full length of your bias tape.

10)  At the end, fold your ends under and stitch to create loops for hanging.

NOW...let's hear your ideas about what to fill them with!!  I had planned little notes and small treats but what suggestions do you have?

And if you don't have a mantle to hang this on, this would work perfect along a staircase railing or on the wall.  OR you could even sew a much larger version of the stocking onto an old vintage pillowcase and put it on your child's chair at the dinner table - then fill it up and let them find some goodies in there when they go to eat breakfast!

Of course, when I hung this inside on our mantle, Sprout was super excited and wanted to know if Santa was coming TONIGHT.  Sadly, no honey.  Not tonight but soon.  Actually, I was a little leary of her trying to reach into these pockets with them strung from the mantle so for safety sake, I'm hanging this down low and along a wall in our kitchen where the kids can easily get into the pockets and I don't need to worry about somebody pulling the entire mantle from the wall down onto themselves.  What?  In my house, that would totally happen.  Right?  Kitchen it is...


{my handmade holiday list}


I am making my list.

My handmade holidays gift making list.  Have you got yours together yet?

You know what happens, every year, without fail, December 10th or so hits and suddenly I am sewing maniac - staying up late - making all kinds of things for teachers and friends and family.

Not this year.  I promise.  I'm going to start early!  (and if you are already done with all your making and it's still October - I don't even wanna know!!  LOL!)

So I have some Two Peas ideas to share with you AND some serious discounts too!  Sale ended Oct 31st

Teachers

  1. How about a patchwork lanyard?
  2. I LOVE LOVE LOVE my Schoolhouse Clutch pattern.  It holds a full size notepad and it's just cute!
  3. These patchwork wristlets are perfect especially with a little gift card from oh, let's say Starbucks, inside!

For Friends and Family
  1. My favorite go to that my sisters and friends love, Sprouts Scarf(lette)
  2. I am making my Mom one of these table runners this year but with a winter theme in blues and neutral colors and the words "let it snow"
  3. The Hazel Hipster and the Mary Beth Messenger are both favorites of my nieces.
And for all your holiday baking...you can't go wrong with this adorable apron for YOU.
I already have some fabulous holiday prints picked out and on my cutting table to make Patsy Ann Apron tops for my girls for our cookie baking this year.  These are quick and SO easy!!  One of my peas even made one herself this summer to wear as a top - but I'm anxious to make them a few Patsy Anns just for Christmas!  AND Extra fun because you can wear it both IN the kitchen and OUT shopping!  Bonus!
So, along with some free tutorial help here - I have pattern discounts to share with you too!   To help you with your handmade gift giving.  One of my non-sewing friends a few years ago bought me a fat quarter bundle, a new pattern and a gift card to a local quilt shop.  Best gift ever!
ALL OF THE PATTERNS in my shop RIGHT NOW are 15% off. AND on top of that, buy any 3 patterns and get a 4th pattern free. Buy 6 patterns, get the 7th and 8th pattern free.  (Limit of 2 free.).
Sale ends October 31st.
(Be sure to mention in the comments your free pattern selection)
There are tons of handmade holiday ideas out there - do you have one to share?  Leave your ideas in the comments section...and get busy on that crafting list so you can be done early and enjoy the holidays!
Linking up with Today's Creative Blog

{mystery sew along - day 3}

Ready to finish up our mystery sew along?  Go back HERE for Day 1 and HERE for Day 2 so you can catch up if you missed the first parts.

OK kids, got your twine handy?

 Cut 3 pieces of your twine about a yard in length (36" or so).  Find the middle of one piece, center it on the bottom of your mystery ball and following one of your seams, tie it in a knot at the top and pull it tight.  Repeat this until you have your twine tied up on each seam.  Leave the excess twine for now - don't trim it.  Now you will see our ball has been "quilted" and has these puffy defined sections.  You can put a few stitches on the bottom to keep the twine in place or even a dot of hot glue if you'd like.

What on earth could this mystery ball be??  Is it starting to come to you now?

Well, we are in the home stretch.  Right click on the pattern below, save it and print it out.  I had to go outside to get some inspiration to sketch this next part.

Yes, you may want to choose a green print for the "leaf" looking pattern.  And the one that "resembles a stem" might look good in brown.  Not that they are a "leaf" and a "stem" but just sayin, that might work out well in those colors.  Take two of the "leaf" pieces, right sides facing, stitch all the way around leaving about an 1 1/2" opening in the base.  Repeat for the other set as well as the "stem".  Turn them all right sides out and fill with your stuffing.  Don't overfill the "leaves" too much.

See the little red arrow up there?  You could hand stitch OR machine stitch some detail on this "object that resembles a leaf" to "resemble some veins"...you know, in case it was in fact, a leaf.

Next, tuck under your opening on the "leaves" and then place on the top of your "ball" and stitch on.  Place that "stem" looking thing in the center of the "leaves" and tuck under your edges and stitch it on.  Next, take your excess twine that was left hanging and tie it in a bow around your stem.

What's that you say?  It looks like a pumpkin?  Awesome!  Cuz' IT IS A PUMPKIN!

A fun patchworky wonky kind of pumpkin!  SURPRISE!!  Were you totally surprised?  Ha!  Was it fun? NOW...guess what, on Monday, for my inspiration link up party, can I ask if you will post your pumpkins?  I would love to see them! That would be awesome!  Let me know what you think of this mystery sew along...maybe we can do more! ...I hope you think it was fun and worth it!)

Linking up with Today's Creative Blog

{mystery sew along - day 2}

Hmm...so what could it possibly be?  The mystery continues!

If you are just joining us, go back here to start from the beginning of our mystery sew along.

I am so happy to be sharing this project with you because it brings back fond family memories.  My Aunt used to do TONS of craft shows when I was a little kid.  LOTS of seasonal items and this is a spin on something she used to make back in the 80's.

Today, we are going to use a paper pattern.  Right click on the pattern down below here, save it and print it out.  You may need to do some adjusting on the size -  your pattern piece should measure roughly 10 1/2" from point to point and roughly 4 1/8" at the center widest point.

For this object we are making which shall remain a mystery for now, you can certainly alter the size of this mystery pattern to make various size mystery objects.  Thought I was gonna say what the mystery object was, didn't you?  Nope, it's still a mystery.

Print out the template.  Lay it out on your 6 panels you created yesterday.  Center the template over the center block and cut out your pattern on each of the 6 panels.

Now, take 2 of the panels and lay them right sides facing.  Pin and with 1/4" seams, sew down one long edge.

Continue to add panels on in the same manner.  You are forming a ball.  Now...don't go blurting out if you think you now know what we are doing.  Keep it a surprise.  Just hold your horses!

When you get to the last panel and you are stitching your "ball" closed, LEAVE AN OPENING about 3" long towards the bottom.  Sew your corner points and come up just a bit from the bottom and leave that opening towards the bottom.

Turn your "ball" right side out and stuff it firmly with your stuffing.  Then slip stitch the opening closed.

Wow.  So we are making a mystery ball?  No.  No we are not making a ball.  Come back tomorrow and you'll soon find out!